Pages

Tuesday, October 2, 2012

Turn it UP!

I've been absent from the blogging world for awhile, forgive me. I tend to run out of things to say! But, I have a lot of new ideas for the shop and for the blog here. I'm excited!

I'd like for you all to be able to get to know me a little better as a person and a shop owner, AND, I want to get to know you all too!

Of course, creating things is my favorite. A lot of my creations are made with the help of music. I LOVE MUSIC! CAPS are not big enough to describe it! All kinds of music too - from Pink Floyd (my all time favorite) to Hank Williams 1,2 and 3, Tool and Type O Negative. I can even appreciate rap (mostly the old school stuff).

So many groups and songs are also very significant to me and instantly take me back to some point in my life. For example, the first album I ever had of my own (a cassette tape, of course) was "Sgt. Pepper's Lonely Hearts Club Band." My dad bought it for me because I asked for a Beatles album. He came home with this and I was very unhappy in my 3rd grade mind, thinking this Sgt. Pepper guy was not at all associated with the Beatles. Dad convinced me otherwise and since then it's been on of my favorite albums.


The Beatles "Good morning, good morning"
 
My mom also has had some musical influence on me. She likes a lot of the same stuff my dad does, but she's more a motown/R&B type of girl. I remember her telling me about a particular song that she remembers her mom listening to and it's stuck with me.
 
Seals and Crofts "Summer Breeze"
 
And then high school hit, and I went from Seals and Crofts, to Type O Negative. I love both versions.
 
Type O Negative "Summer Breeze"


As much as I love music, I'm really pretty clueless about new music. I need you all to help me out! Who should I check out?

Monday, January 23, 2012

Rain, rain, you can stay, as long as we don't float away..

Today it rained. That doesn't sound like anything newsworthy, unless you live in southern California where "sunny and 70" is the norm. I grew up in eastern Pennsylvania where precipitation and overall dreariness is common, and for the most part, the only time the Weather Channel warned us was when we needed to get out the snow shovel or batten down the hatches. Here in California, we get alerts when we might get a half inch of rain over the course of a day. I welcome the rain here, it's a nice change of pace, and it usually results in mayhem and then sleepiness in our house!

Meet Apollo. The red heeler/Australian shepherd/something-with-long-legs mix, who thinks he is a lapdog. He's a sweetheart. Sorry for the camera blur, he kept trying to sniff my lens!


This is how he spent most of the day, which I can appreciate.


Since the boys couldn't go outside (mostly because it was pretty chilly, I'm all for splashing in puddles!), they sculpted some Play-doh snakes and cupcakes...


...while I made some chocolate chip banana bread, which is already almost half gone! My first love is baking (sorry, sewing), and I haven't made anything sweet and scrumptious since Christmas. That's just unheard of! I was glad to be tinkering in the kitchen a bit.


And of course the day wouldn't be complete without some sewing...err, pinning...LOTS of pinning..


A likeness of this will be posted in my shop shortly!  

What did you do today?


Tuesday, January 17, 2012

Tutorial - Satin Flowers

It's been kind of quiet in my little nook here, but I'm back! With a new tutorial!

Last week, I held the first ever giveaway here and the winner got a pretty satin flower pin. Now, I'll show you how to make them so you can attach one to every surface that's pinnable! Satin flowers for everyone!

Not too long ago, a friend of mine and I were in the process of making wedding garters. Coincidentally, both of our sisters got married within days of each other and both requested a handmade, crafty garter. Hers was much different than the one I was making, but both involved some satin flower making. Neither of us had attempted making them before, but we knew it involved an open flame so we vowed to look out for flames and smoke pouring out of each other's homes! Luckily, neither of us are homeless right now.

So, the first thing you need is some satin or any other synthetic fabric that will melt. You'll need to cut a strip of it, about 3 feet long and about 4 inches wide or so, depending how full you want your flower to be. One side of the strip should be wider than the other.


The goal here with this strip is to have graduated sizes of cut squares. The bigger sizes will be the larger petals, and the smaller ones will fit inside those. Go ahead and cut your squares, starting at 4 inches or so across.


Then take each square and round off the corners. You can make them more of a perfect circle or just roughly cut the corners off, it's totally up to you. You could probably even keep them as they are, although I haven't tried that yet.


Now comes the fun part, the edges. You'll need an open flame so any candle you have handy would work as long as the flame is accessible. I use one of those Glade scented oil candles, then my house smells delicious in the process! Hold the satin circle above the flame and slowly lower it closer until you see the edge of the fabric start to curl and melt. Not too close or you'll end up with blackened edges. I, personally, like the look of the slightly burnt edges, but all you really need is a little melted edge.


You can even touch the middle of it to the flame to create a little crinkle in the middle.


Once you've melted all your "petals", it's time to assemble them. Grab a needle and coordinating thread and a scissors. Pile the petals, starting with the biggest, and arrange them until they look pleasing to you. You can take some away, or you might choose to cut a few more. Once you have them how you like them, tack them in place. I double up my thread and make a little "X" right in the middle of the petals.


And viola! A flower!

From here, you can attach some beads in the middle or a jewel, a small sparkly brooch even. Then you can attach the pin on the back. The pins you can find in any craft store, I got mine at Joann's in beading section.
Just take some thread and go around the pin and through the petals a couple times until it's secure. You can also add a touch of hot glue just to make sure that baby isn't going anywhere.


If you have some leftover petals, make another one!


Then pin them everywhere!


Happy crafting!


Saturday, January 14, 2012

Giveaway winner announced!

Happy Saturday everyone! Thank you to everyone following along here, it's great to have you! I have a tutorial coming up and of course other random crafty posts to come!

But, now onto the exciting part - the winner! I've used random.org to come up with the winner and it is...Sini Huupponen! Congratulations!!

Thanks again, everyone, I hope to do more giveaways in the future!


Tuesday, January 10, 2012

Flowers in winter - GIVEAWAY!

This has been a week of firsts for me - first time with bias tape and grommets, first time making etouffee, and now, my first blog giveaway!

I'm sure some of you are done and tired of winter, dreary days and snow. So, I have a little flower here to brighten up your day. Or your sweater. Or your scarf! Your hair or your purse! The possibilities are just about endless.

This is made of royal blue satin with 3 pearl-esque beads in the center and a 3/4" brass plated pin sewn AND hot glued on the back.


Just to give you an idea of how this would look -


Now for the technical portion - how to enter to win! It's simple, just follow the Hidden Grins blog and leave me a comment here!

The giveaway will begin today, 10 Jan 2012 and end 14 Jan 2012 at 12 noon PST.

I will announce the winner here shortly after 12 noon on the 14th!

The winner will be chosen using random.org.

Good luck!


Sunday, January 8, 2012

What I do when I'm not sewing...

This post is a little off topic, but I thought it might give you a better idea of who the crazy person is behind Hidden Grins.

I grew up on the outskirts of town in Eastern Pennsylvania. By "town" I mean a general area where a handful of people dwell. Not the smallest, but don't blink when driving through it or you'll miss it.

My mom and gram ALWAYS cooked and baked, and almost always improvised. So much so that my mom's steaks would be done when the smoke alarm went off..I really try not to repeat that though..

I have many, MANY interests and of course one of my favorites is cooking. Well, baking mostly, but cooking comes in second. I love trying new recipes, so tonight I gave etouffee a whirl. A southern friend of mine described it once as "a bunch of stuff in a pot"...can't go wrong with that, right?

So I started with some olive oil in a big pot over medium-high heat.

While that was heating up, I chopped 4 stalks of celery, 1 big onion, 1 bell pepper and 4 cloves of garlic.

Next, I added about 1 pound of boneless, skinless chicken thighs to the pot and cooked those for about 5 minutes per side, just until they're browned a bit. Don't forget to season those with salt and pepper!


Once those were done, I set them aside on a plate and, with 1/4 cup of chicken drippings or oil (add or take away as needed), add 1/2 cup plus 2 tablespoons of flour. This makes the roux to thicken the etouffee to a stewy goodness. Let the flour cook some until it's golden and a little nutty smelling.


Time for the veggies! Throw the celery, onion, pepper and garlic in there and stir it around. Also, add some cayenne to taste. Let that cook until the veggies are tender.


Then, pour in 4 cups of chicken broth and give that a good whisk. Put the chicken and 1 pound of chopped or sliced smoked sausage in there and let it simmer until the chicken is fully cooked, about 25 minutes.


 Once your 25 minutes are up, fish the chicken pieces out and either shred or chop them, whichever you prefer. Return the chicken to the pot, add 2 pounds of peeled and deveined shrimp and 2 tablespoons of dry sherry. The sherry added a ton of flavor and aroma to this, I wouldn't skip it.


 Let that cook for about 3 minutes or just until the shrimp turn pink. Season with salt and pepper and you're done!


Now, I was going to make some plain ol' rice to go along with this. I love plain rice, but I saw another recipe for toasted rice, and that sounded WAY better...

Just melt 4 tablespoons of butter in a small pot over medium-high heat. Stir in 2 cups of rice, 1 teaspoon of salt and 1/2 teaspoon of pepper.


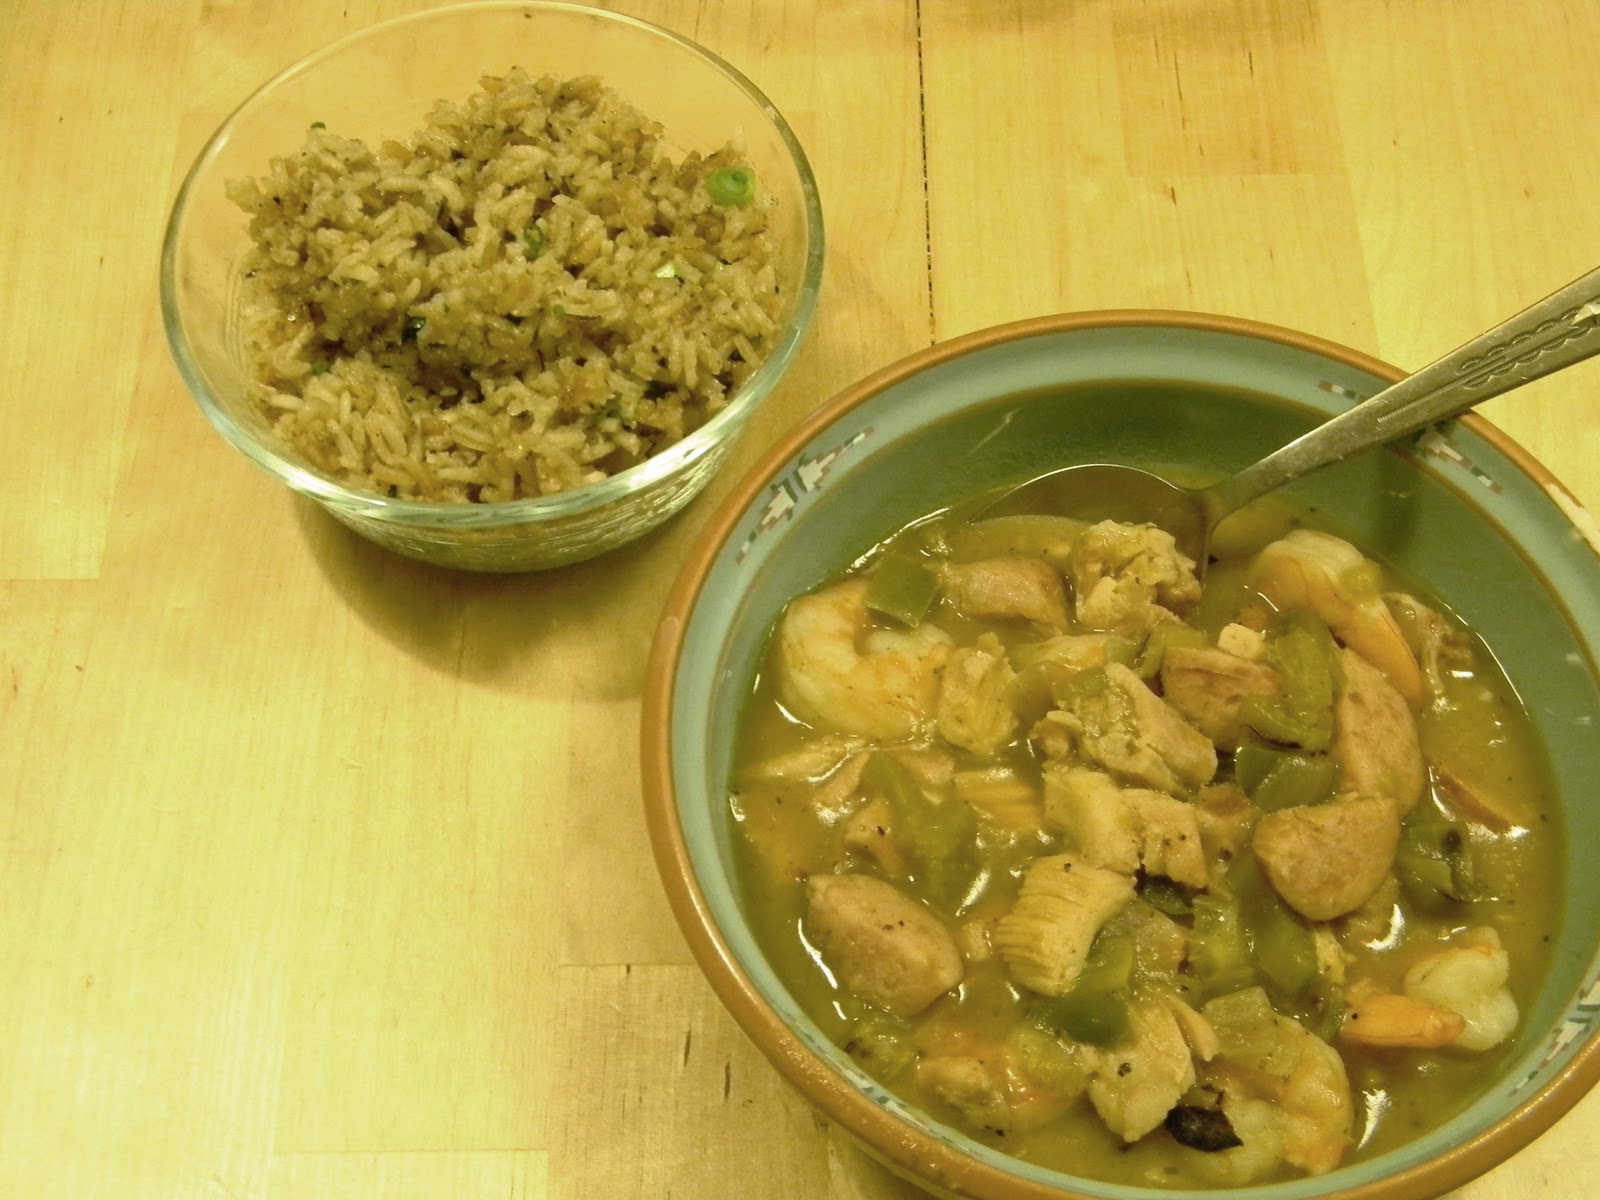
 Cook the rice until it's golden brown (not Cajun style like mine was!) Add 2 cups each of chicken broth and water and bring that to a simmer. Then cover it and turn the heat down to low for 15 minutes. Take it off the heat and let it sit for 5 minutes. Then, fluff it with a fork and stir in some chopped green onions and fresh parsley.


Done! And was it ever delicious. The original recipe used andouille, but I'm not really a fan of it so I subbed the smoked sausage.
The original rice recipe used converted long-grain rice, which I don't have, so I figured regular white rice would do. Both recipes can be found here -
and here-
Thanks Foodnetwork!

And the best part of the evening was my wonderful husband doing the dishes. Love that man!


Friday, January 6, 2012

Bias tape adventures

This purse has brought on a few firsts for me - first time making and using bias tape and first time using grommets (no smashed fingers!)

I've seen those nifty bias tape makers, the basic one like this -


to the high speed ones like this -
I don't have either of these, however. I DO have an iron though! So, I was a little intimidated, but I checked out this tutorial from my favorite crafty blog, MADE , and went from there.
I started here, with the selvage edges together... 
I then folded it over into a big triangle...
..marked a 3" strip..
..and cut, with the help of some Angry Birds and my 4 year old. : )
This was probably the hardest part, making the strips line up with each other. In the tutorial it says that the strips need to make a 90 degree angle, but I still had a little trouble.
I had to do a little seam ripping on this one.
And then I had to take a break to clean up jello hands : )
On to ironing. After I sewed all the 3" strips together and pressed the seams (either right or left), I pressed it in half the long way. The hot dog way, if you will.
After pressing it in half, I folded and pressed one side up far enough to meet the middle crease. The other side I also pressed but not quite as close to the middle crease. This leaves the one side a little longer when sewing the binding on, so you'll more easily be able to catch the under side that you won't be able to see. I also clipped the corners from when I sewed the 3" strips together.
After all the ironing (this took me the better part of an hour), I have BIAS TAPE! Woo!

I then pinned the tape all around the edges of my purse. And when I say pinned, I mean PINNED. I must have stabbed myself a dozen times. I'm sure my son was wondering what the heck I was doing.
Then I began sewing it, inch by inch. It didn't shift much, and with the one longer side, I didn't miss any portion of it on the other side. Although, the next time I do this, the longer side will just be a hair longer, not an 1/8" longer, as I had made it. I didn't need that much extra at all.
And that is my adventure with bias tape! Not nearly as scary as I thought.

After putting the grommets on, and tying on the bamboo handles, I was finally finished! I really like how this turned out, despite all the pink. I may learn to like pink. : ) 


Wednesday, January 4, 2012

It's PINK!

So, the holidays are over, all the decorations are put away, I've cleaned and straightened...now what? Back to stocking my shop, that's what!

I took a little break about a week before Christmas to bake some cookies with my boys, finish decorating, watch some Charlie Brown Christmas, you know, the important stuff.

Now, I'm back to sewing and working on a really cute custom order handbag. I have to say, I was leery about this one. I'm not much of a fan of pink, but it's really growing on me!


I've also been working on something else that fits into the obscenely pink category - a random heart table runner. This will be quilted and and top stitched..pardon the wrinkles, I got excited and HAD to take a picture or two!


I have a few other ideas in the works as well, stay tuned!